How to Turn a Landmark Into a Custom Souvenir
author: DP58
2026-10-28
How to Turn a Landmark Into a Custom Souvenir
Introduction
Every destination has at least one image that lives rent-free in visitors' minds: a tower, a bridge, a cathedral, a rock formation, a statue. That image is the single most valuable design asset a tourist attraction owns — and yet most gift shops reduce it to a flat photo on a keychain.
Turning a landmark into a successful custom souvenir is a design and manufacturing project, not an art project. It requires choosing the right level of abstraction, the right material, the right scale, and the right price point — and doing it in a way that survives tooling, moulding, and mass production without losing the thing that made the landmark recognisable in the first place.
This guide walks through the full process: from selecting which landmark features matter, to briefing a manufacturer, to testing prototypes, to building a product range around a single iconic form.
1. Start With Recognition, Not Realism
The most common mistake buyers make is asking for a highly realistic replica. Realism is expensive (fine detail means expensive tooling and high reject rates), fragile (thin spires and protruding elements break in transit), and often less appealing on a shelf than a stylised form.
What sells is instant recognition. The test is simple: if a customer sees the object from two metres away and names the landmark within one second, the design works.
Ask your designer to produce silhouette studies first. A landmark's silhouette — its outline against the sky — carries most of its identity. If the silhouette reads clearly, the souvenir will read clearly. If it doesn't, no amount of surface detail will save it.
Practical rules:
-
Exaggerate signature features. If the dome is the landmark's defining element, make the dome slightly larger and the base slightly smaller.
-
Simplify or omit secondary structures. Scaffolding, fences, adjacent buildings and modern signage usually hurt more than they help.
-
Preserve proportion relationships. Visitors remember the relationship between elements (tower height vs. base width) even if they can't articulate it. Distorting proportion is what makes a souvenir feel "wrong" without anyone knowing why.
2. Decide the Level of Abstraction
There is a spectrum, and each point on it implies different materials and costs:
|
Level
|
Description
|
Typical material
|
Cost band
|
|
Photographic
|
Printed image of the landmark
|
Ceramic, magnet, print
|
Low
|
|
Relief / 2.5D
|
Shallow 3D form on a flat backing
|
Polyresin, ceramic
|
Low–mid
|
|
Simplified 3D
|
Stylised full-volume model
|
Polyresin, resin, metal
|
Mid
|
|
Detailed 3D
|
Multi-part accurate model
|
Polyresin, metal, 3D-printed
|
Mid–high
|
|
Functional hybrid
|
Landmark form as a usable object (bottle, lamp, container)
|
Ceramic, glass, resin
|
Mid–high
|
Most successful landmark souvenir ranges include two or three levels — a cheap entry item (magnet or keychain) at the relief or simplified-3D level, a mid-priced figurine, and one premium piece. This gives the shop a price ladder and gives the visitor a reason to buy more than one item.
3. Map the Landmark's Design Vocabulary
Before briefing a factory, build a small internal design brief containing:
-
Primary views: front, side, three-quarter, and the view most commonly photographed by visitors.
-
Hero features: the three to five elements that must be present and accurate in relative position.
-
Expendable features: elements that may be simplified or removed under production constraints.
-
Colour palette: official or de facto colours, with Pantone references if available.
-
Prohibited elements: modern additions, adjacent commercial buildings, copyrighted artworks or sculptures on the site.
-
Scale reference: the real dimensions, so the designer can decide the reduction ratio.
This document prevents the single most expensive failure mode in landmark souvenirs: a factory producing a technically excellent model of the wrong version of the landmark.
4. Handle Intellectual Property Early
Landmark IP is more complicated than most buyers expect.
-
Public monuments and natural features are generally safe to reproduce, but check local rules — some countries restrict commercial use of certain national symbols.
-
Buildings designed within the last ~70 years may still be protected by architectural copyright in some jurisdictions.
-
Sculptures, murals, and artworks on or in the landmark are usually separately protected, even when the building is not.
-
Official names, logos, and trademarks of the managing organisation require licence.
-
Museum and theme park landmarks almost always require a licence agreement, and many attractions actively enforce this.
If you are the attraction itself, you own the rights and the process is straightforward. If you are a third-party manufacturer or gift shop, get written confirmation from the attraction before tooling begins. Tooling costs are non-recoverable; a cease-and-desist after the mould is cut is a total loss.
5. Brief the Manufacturer Properly
A landmark brief should include, at minimum:
-
Reference image pack (minimum 8–12 images, multiple angles, different lighting).
-
Silhouette drawing and dimensioned sketch.
-
Target size and weight in the finished product.
-
Target material and finish (gloss, matte, antique wash, hand-painted, etc.).
-
Target FOB price and order quantity.
-
Packaging requirements.
-
Compliance requirements (EN71, CPSIA, REACH, food-contact if applicable).
-
Required sample and production lead times.
Ask the factory to return a clay or 3D-printed maquette before cutting production tooling. Review the maquette for silhouette accuracy first, then detail, then surface finish. Rejecting a maquette costs a fraction of rejecting a mould.
6. Prototype, Then Prototype Again
Expect two to three prototype rounds for a new landmark sculpt. A realistic timeline:
-
Round 1: rough form, silhouette check — 7–14 days.
-
Round 2: refined detail, proportion correction — 7–10 days.
-
Round 3: colour and finish approval sample — 5–10 days.
At each round, review against the hero-features list, not against personal taste. If a feature on the "must have" list is missing or misplaced, send it back. If a feature on the "expendable" list is imperfect, let it go — chasing it costs weeks and rarely changes sell-through.
7. Build a Range Around One Form
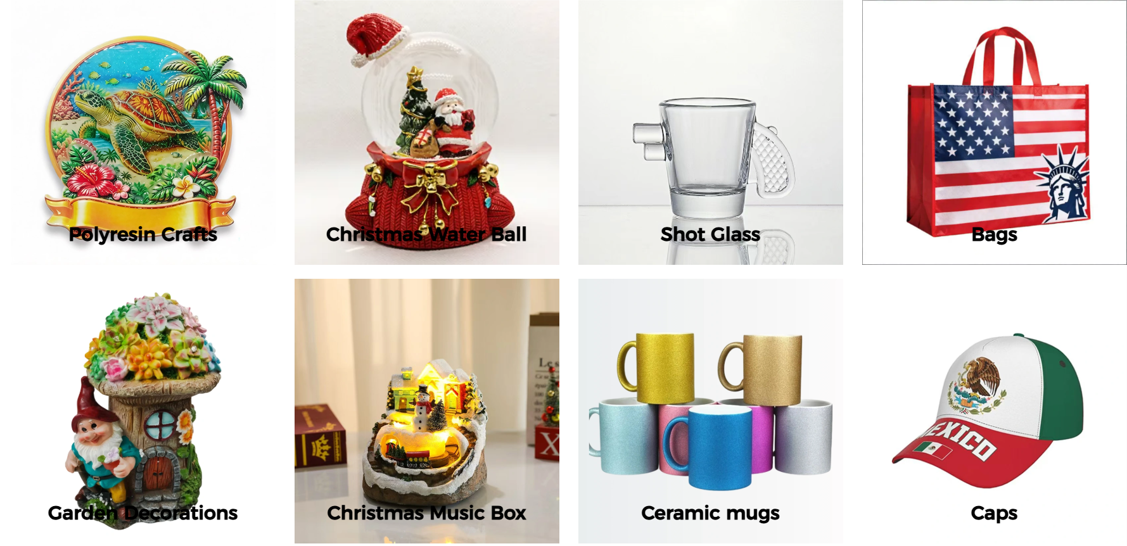
The commercial payoff of a landmark design project comes from reusing the sculpt across products, not from selling a single item. A single approved landmark master can typically generate:
-
Fridge magnets (relief version, low cost)
-
Keychains (simplified 3D)
-
Polyresin figurines (full 3D, multiple sizes)
-
Snow globes (figurine inside the globe)
-
Ceramic mugs (relief wrap or decal)
-
Bookends, pen holders, photo frames (functional hybrids)
-
Packaging and bag artwork (2D use of the silhouette)
Amortising design and tooling across 6–8 SKUs is what turns a landmark souvenir from a nice idea into a profitable product line.
8. Test Before You Commit to Volume
Run a small pilot: 100–300 units, sold in the attraction's own shop or a partner retailer, for four to six weeks. Measure:
-
Conversion rate (units sold ÷ visitors passing the display)
-
Price elasticity (test two price points if possible)
-
Breakage and return rate
-
Customer comments on recognition ("is that supposed to be…?")
A landmark souvenir that fails the recognition test in the pilot will fail at volume. It is far cheaper to redesign after 200 units than after 20,000.
Conclusion
A landmark is a brand asset. Turning it into a souvenir is a disciplined process: reduce to a readable silhouette, choose an abstraction level, document the design vocabulary, clear the IP, prototype in stages, then exploit the approved sculpt across a product range. Attractions that follow this sequence end up with a souvenir line that visitors recognise instantly — and buy repeatedly.
How to Develop a Custom Souvenir Collection for Your Brand
From Idea to Finished Product: How Custom Souvenirs Are Made